Using Github Actions to Deploy My Blog
Introduction
I’m using Hugo to create this website and hosting it on Github Pages.
In this post, I’m going to explain how I’m deploying changes to this website with just a git commit (and followed by git push of course).
I’ll show how I used Github Actions feature to automate the process.
Links will be provided to the other guides I used for reference as we go along the process.
Prerequisites
- Know how to use Git. Github has a great handbook where you can start learning if you’re just getting started.
- A Github account.
Create a Hugo website
I won’t go into much detail about how to install Hugo and create a website. Their Quick Start has pretty much got you covered.
Host the website on Github Pages
Once again, the Hugo team has delivered. Their official guide has good instructions on how to setup your folders, Github repos and the necessary commands.
Side Notes
- Use
.gitignoreto ignore build files/folders. Use.gitkeepto keep required folders that are initially empty when you start. You can have a look at the file I’m using here. - Once you have pushed the changes on
publicfolder to Github, make sure to commit changes onyour-projectrepo as well. This is necessary to update commit pointers on the submodules.
git commit -am "commit public folder submodule"
Comments on this method
The method used above is quite straightforward.
- Make changes to your website and build it.
- Commit and push changes on the
publicfolder. Website updates on Github Pages<username>.github.ioautomatically. - Commit and push changes on the
your-projectfolder.
But I wondered, wouldn’t it be easier to commit changes just to the your-project and have the build and commit to the Github Pages repo be done automatically?
I set out to make some improvements in the workflow.
Ready for Github Actions
Github Actions is quite recent compared to the other CI tools. But there’s a lot of active development ongoing, with people building actions and making them available on the Marketplace.
When I first started exploring the feature, there was a lot of Github official templates that really helps you understand how this can be applied to various things you’re trying to do. So I highly recommend taking a look at their templates before you start getting into developing a workflow.
Writing your own Actions vs. using Community Developed Actions
When creating workflows, I found that there are two approaches you could take:
- Write your own actions/steps with manual commands. This might be the way to go, if you have concerns on what kind of access you’re allowing the actions to have on your repo.
- Make use of community actions that dedicated contributers has published that are stable and we can start using immediately. Personally I found this quite helpful when starting out. It made it so much quicker to get things running. Also the source code for these actions are public so you can check it out to see what’s going on under the hood.
So a special thanks to the contributions made to Github Marketplace, where you can avoid re-inventing the wheel and make quick progress with your CI/CD pipelines. There’s a really nice collection of workflows/actions for you to start with.
And a shout out to Shohei Ueda / peaceiris who’s actions I’m using for this purpose.
Designing a Workflow
In order to create a workflow that would run against your repo, you need to create the action file. It’s a good idea to map out the steps you want it to follow before you start writing.
Steps:
- Run the action upon any push to
masterbranch. - Checkout the code from
your-projectrepo. - Install Hugo binary and build the website.
- Push the
publicfolder to<username>.github.iorepo.
Few changes need to be made to our existing git setup before introducing a workflow.
Remove public submodule
If you followed Hugo’s official guide to host the website on Github pages, we need to remove the public folder which was added as a submodule.
To remove a submodule from git follow these steps in your-project folder..
# Remove Submodule
git rm public
rm -rf .git/modules/public
git config -f ".git/config" --remove-section "submodule.public"

# Commit changes
git commit -m "Removed submodule public"

# Delete the public folder
rm -rf public
Note: Remember to add /public/ to your .gitignore file, (if it was not there previously).
Create the deploy workflow.
All actions are created in .github/workflows folder. So in your-project folder, create the necessary folders and files:
.github/workflows/deploy.yml
Now for the deploy.yml file.
name: Deploy Hugo Website

# Trgger this workflow on any changes to master branch
on:
  push:
    branches: [ master ]

jobs:
  # Write a deploy job
  deploy:
    # Setup the virtual environment
    runs-on: ubuntu-18.04
    # Write the steps to take when runnign deploy job
    steps:
    # Checkout website source
    - uses: actions/checkout@v2
      with:
        submodules: true

    # Setup Hugo
    - name: Setup Hugo
      uses: peaceiris/actions-hugo@v2
      with:
        hugo-version: '0.69.0'
        exetended: true

    # Build website
    - name: Build website
      run: hugo --minify

    # Deploy website
    - name: Deploy website
      uses: peaceiris/actions-gh-pages@v3
      with:
        deploy_key: ${{ secrets.ACTIONS_DEPLOY_KEY }}
        # Change the values to your Github Pages repo
        external_repository: <username>/<username>.github.io
        publish_branch: master
        publish_dir: ./public
        # Define commit username/email to the Github Action bot
        user_name: 'github-actions[bot]'
        user_email: 'github-actions[bot]@users.noreply.github.com'
Save the file.
Now let’s setup the keys to allow the your-project repo to access <username>.github.io repo so that the build files from public can be pushed to it when the build process is running.
To setup the deploy keys so that our repos are able to access each other follow this guide here.
Now make a few changes to the website.
hugo new posts/new-post.md # Add some content
hugo server # Run a local server to test
Commit and push.
git add .
git commit -m 'new post'
git push
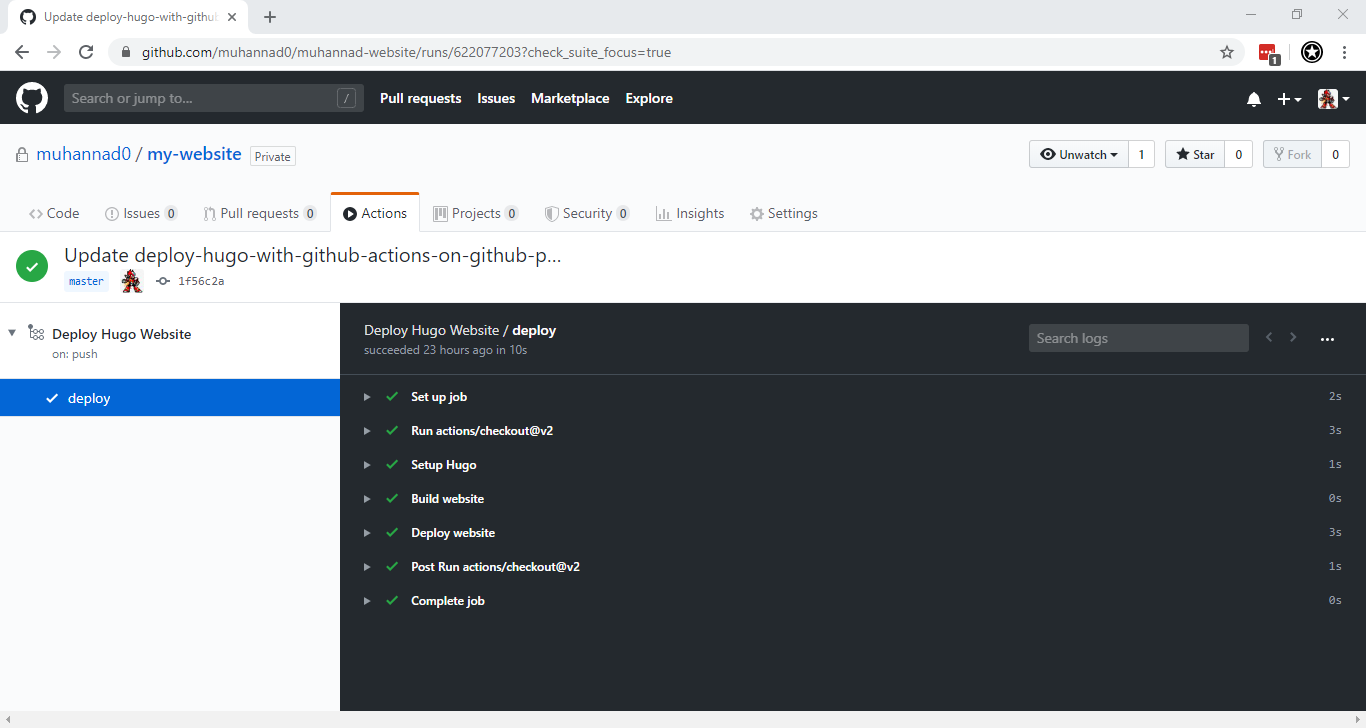
We can monitor what’s going on at the Actions tab on the my-project repo page on Github. This helps us troubleshoot any errors in our workflow file.
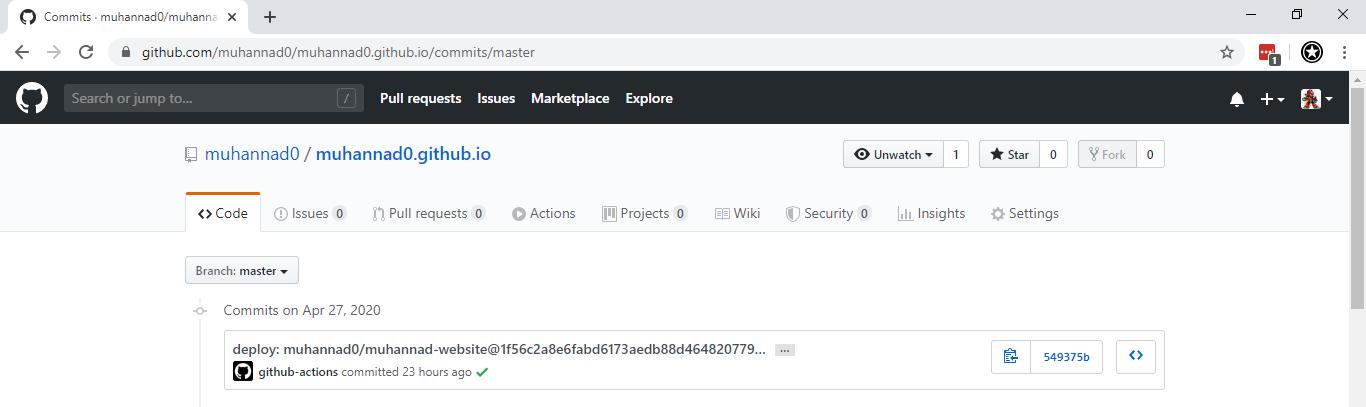
You can see that the changes were pushed to the <username>.github.io repo from the workflow that ran.
Conclusion
With this you can now use Hugo to create a simple static website. You have also setup the necessary git repos to store your source files and deploy the built website to Github Pages.
We made use of Github Actions to deploy the website automatically on a commit to the source files. Also setup the use of deploy keys to allow access between repositories as the build is processed.
With this setup, we have a very simple and easy workflow, making changes and pushing it straigh to production, all without leaving your terminal/IDE.