
Local Development Using Serverless Framework
Recently, I have been working on creating serverless applications on AWS. The goal was to learn couple of programming languages and AWS resources used in these types of applications.
One of the great things about serverless applications I find is that your main focus is on creating relevant functions for the application. The cloud provider handles the other aspects of the stack. For example it can give you an API services, a runtime for your function, managed databases, logs streaming and many more depending on what the use case is. It helped me get more comfortable learning the language and it’s nuances.
The usual development process is that you create your functions on your local machine and use a framework to define the resources required and deploy them to the cloud. What I noticed was that even though the steps required to do this were simple, there are some things that get in the way when starting out.
- Delays in uploading your application package.
- Response times testing against a development stage on the cloud.
- Debugging for errors is a hassle, when having to look at various places on the web console.
Overview
In this guide, I’ll be explaining how I managed to setup a project and get it hosted locally for initial development and testing before packaging and deploying it on the cloud. The steps are mainly focused on the Serverless Framework, but you could apply the same concepts using other languages and tools.
We make use of the following tools for our local development setup:
- Serverless Framework and plugins
- Serverless Offline - for locally emulating Lambda and API
- Serverless DyanamoDB Local - for running a local DynamoDB instance
- Postman - for making calls to the serverless application
Setting Up a Project
In order to use the Serverless Framework, make sure your system has NodeJS and npm available. AWS credentials are configured.
- Install the framework
npm install -g serverless # installs serverless framework globally
- Setup a project, for example let’s use Python.
sls create --template aws-python --path hello-world # creates a serverless project in the folder hello-world
- Setup a virtual environment for Python for local development
cd hello-world # change to working directory
virtualenv env --python=python3 # create the virtual env
source env/bin/activate # activate the environment
- Install required plugins, for now let’s go with serverless-offline at this stage.
npm install --save-dev serverless-offline # saving the offline plugin as a dev dependency
- Modify the
serverless.ymlfile to include the a new section forplugins.
# serverless.yml
plugins:
    - serverless-offline
Invoking a Function Locally
In order to test if your Lambda code is working, you can run it locally with the following:
# locally invoke function
sls invoke local -f <function-name>

# passing JSON data, for a function that takes event data for example
sls invoke local -f <function-name> -d '{"key": "value"}'
Demo Ouput:
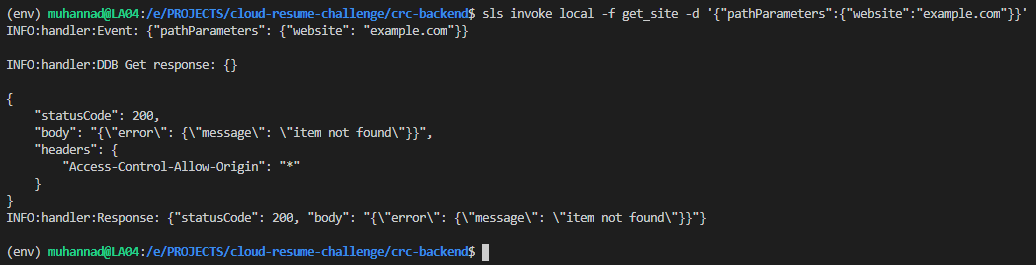
The <function-name> here refers to the function name defined in serverless.yml.
# serverless.yml
functions:
  HelloWorld: <-- function name
    handler: index.handler
    memorySize: 1024
    timeout: 6
Testing API endpoints Locally
Once you are sure that the Lambda code is working fine, you might want test how they run with an API call.
To run a local API server that triggers the Lambda functions, use serverless-offline.
sls offline
Once the server is started, it shows the URL and endpoint details that we had already defined in serverless.yml. We can use them to call the API endpoints.
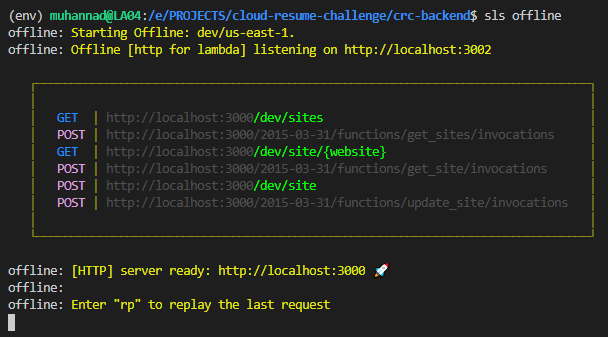
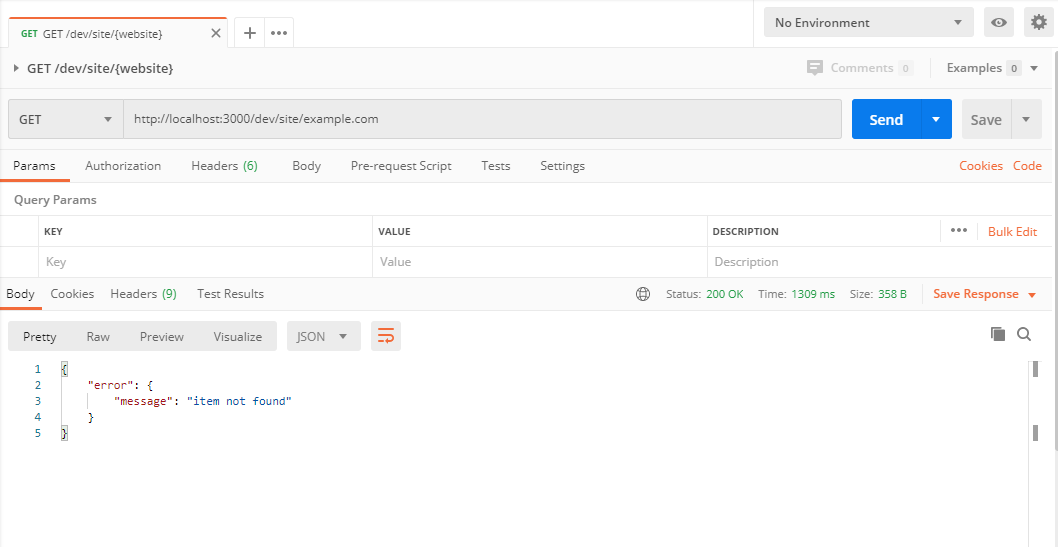
We can use Postman to setup our API calls and send them. For example let’s try using the https://localhost:3000/dev/site/{website} endpoint.
Adding DynamoDB to our project
Let’s say our project requires a database and we have decide to use DynamoDB (of course), we can include the database structure in our serverless.yml and have it build the database for us.
We need to add couple of sections to our configuration file.
# serverless.yml
provider:
    ---

    environment:
        # Define the table name as an environment variable with the stage prefix
        # Allows easy identification and reference to it from the Lambda function
        TABLE_NAME: ${self:service}-${opt:stage, self:provider.stage}-TestTable

# IAM permissions to allow Lambda function to operate on the table
    iamRoleStatements:
      - Effect: "Allow"
        Action:
            - dynamodb:GetItem
            - dynamodb:PutItem
            - dynamodb:UpdateItem
            - dynamodb:DeleteItem
        Resource:
            - { "Fn::GetAtt":[ "TestTable", "Arn" ] }

# resource definition for the database
resources:
  Resources:
    TestTable:
      Type: AWS::DynamoDB::Table
      Properties:
        TableName: ${self:provider.environment.TABLE_NAME}
        AttributeDefinitions:
          -
            AttributeName: id
            AttributeType: S
        KeySchema:
          -
            AttributeName: id
            KeyType: HASH
        ProvisionedThroughput:
          ReadCapacityUnits: 1
          WriteCapacityUnits: 1
Note: The above is a very simple example. But you can use that as a base for your own project.
Now that we have defined the resources needed in our configuration, we can make use of another plugin to setup a local instance of DynamoDB.
Setup of local DynamoDB instance
In order to run a local instance of DynamoDB, we’ll be using the serverless-dynamodb-plugin.
- Install the plugin
npm install --save-dev serverless-dynamodb-local
- Install the database runtime.
sls dynamodb install
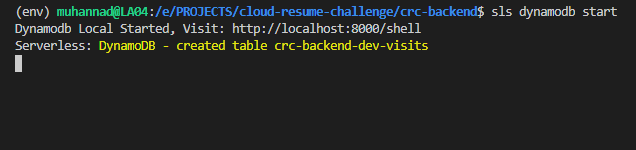
- Start the DynamoDB instance.
sls dynamodb start
Configuration options
There are some interesting configuration options that we can use with the plugin to help us with the intial setup.
Start the DynamoDB along with the serverless-offline plugin.
- Add the plugin to
serverless.ymlconfiguration.
# serverless.yml
plugins:
    - serverless-offline
    - serverless-dynamodb-local
- Start both local API and DynamoDB
sls offline start
Create the tables once DynamoDB instance starts.
- Add custom variables to our configuration to enable the option.
# serverless.yml
custom:
  dynamodb:
    # If you only want to use DynamoDB Local in some stages, declare them here
    stages:
      - dev
    start:
      # After starting DynamoDB local, create DynamoDB tables from the configuration.
      migrate: true
Demo Output:
Deploy
Now that we have everything ready, let’s walkthrough a typical development workflow.
- We start up our IDE, write some code, and want to test our API endpoints to see if everything works fine. This starts up our local API endpoint and DynamoDB
sls offline start
-
Test some API calls using Postman.
-
Deploy to AWS (to a different stage if you wish)
sls deploy --stage dev
Conclusion
The described setup of using serverless-offline and serverless-dynamodb-local plugins withing the Serverless framework has been a great help.
- Allows the development environment to be setup quickly.
- Ability to run quick tests on the local machine (compared to deploying and and running against resources on AWS).
There are a couple of other useful plugins that might be interesting. For example this guide explains how to manage packaging for Python projects.
It’s always a good idea to check out the Serverless Tutorials to learn more about the framework.